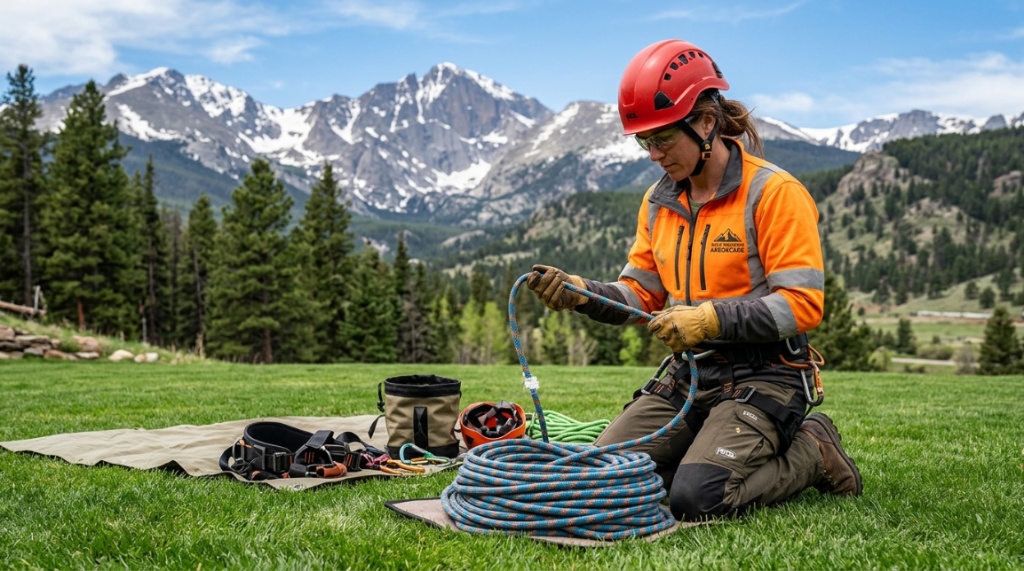
You’re standing at the base of a towering oak, chainsaw oil staining your gloves, looking up at the limbs that need trimming. The adrenaline is there, but so is that nagging knot in your stomach—the one that asks, “Is my gear actually going to hold me?” The reality is that tree work is unforgiving, and choosing the wrong rope kit can turn a routine pruning job into a life-threatening event. You don’t need the most expensive rig on the market, but you absolutely cannot compromise on the integrity of your line. This guide will walk you through the exact features that separate a deadly bargain from a true value, ensuring that your budget arborist rope kit safety standards are met without breaking the bank.
We all want to save a few bucks, but when your life is literally hanging by a thread—or in this case, a rope—you need to know exactly what you’re buying. The market is flooded with options that look identical but perform vastly differently under load. Let’s cut through the marketing fluff and look at the hard numbers, the fiber types, and the construction methods that dictate whether you’ll climb down the tree or be carried down.
What Defines a “Budget” Arborist Rope Kit Without Compromising Integrity?
A truly budget-friendly arborist kit is one that prioritizes core safety certifications and fiber durability while stripping away unnecessary accessories and premium branding costs. It is the sweet spot where you get a static or low-elongation rope, a reliable friction device, and a proper harness that meets ANSI Z133 standards, all without paying for the “luxury” tax of high-end gear labels. The price difference between a $150 kit and a $400 kit often lies in the frills (like fancy storage bags or carabiners) rather than the safety-rated core components.
When we talk about budget in this context, we are defining a range between $150 and $300. This price point allows manufacturers to use quality materials like polyester or nylon cores without the exorbitant cost of HMPE (High Modulus Polyethylene) fibers. The trick is learning where corners can be safely cut—like the stitching on a gear loop or the material of the rope bag—and where they absolutely cannot, such as the MBS (Minimum Breaking Strength) and impact force ratings.
Key Safety Certifications to Look For
If your kit doesn’t come with a tag stating compliance with ANSI Z133 or OSHA regulations, do not buy it. These certifications are not just stickers; they represent rigorous testing for tensile strength and elongation. A budget kit must include a rope rated for arborist use (typically 24kN or higher) and a harness that has been third-party tested for fall arrest, not just work positioning.
Understanding the “Hidden” Costs of Cheap Kits
Often, the cheapest kits skimp on the prusik cords or friction hitches, using generic low-quality cord that melts under friction. While the main line might be fine, these accessory cords are critical for your life support. A true budget kit should still include a 10mm or 11mm Eye & Eye prusik made from a heat-resistant fiber like beeline or similar, ensuring your friction hitch actually grips and releases smoothly.
Fiber Composition vs. Price
Don’t get caught up in the hype of exotic fibers. For a budget kit, a double-braid polyester rope is your best friend. It offers low stretch, high durability, and is UV resistant. Nylon is cheaper but stretches more, which is dangerous for climbing. Verify the rope’s sheath percentage; a tight, braided sheath protects the core from cuts, which is non-negotiable for safety.
Why Is Rope Elongation More Critical Than Breaking Strength for New Climbers?
For a beginner arborist, elongation—how much the rope stretches under load—is the silent killer. While breaking strength tells you when the rope will snap, elongation tells you how much energy you absorb in a fall. A rope with too much stretch (dynamic) will bounce you into the tree trunk, causing injury; a rope with too little (static) can transmit deadly shock loads to your harness and body. Safety relies on a balance, typically staying under 7% elongation for arborist lines.
Many novices obsess over the “Maximum Breaking Strength” rating, thinking higher is always safer. However, a high-breaking-strength rope with high elongation is actually more dangerous in a work-positioning scenario because it creates a “bungee” effect. When you are using a rope wrench or hitch climber, you need a rope that holds you rigidly in place without sagging, allowing you to focus on your chainsaw cuts, not your footing.
The Physics of a Fall on a Static Line
When you fall on a dynamic climbing rope, it stretches to absorb the energy. In arboriculture, we use low-elongation ropes to stay rigid, meaning the fall factor is absorbed by your body and the friction device. This is why the friction hitch is so vital; it acts as a shock absorber by slipping slightly under high load. If your “budget” rope is actually a repurposed static rescue line, it might be too stiff, causing the hitch to grab too hard and slam you against the trunk. The ideal rope has a supple sheath that allows the hitch to grip progressively.
Knot Stability and Rope Memory
Cheaper ropes often have high “memory,” meaning they kink and coil awkwardly, making it hard to tie proper knots or throw a line. A safe budget rope must accept and hold a Blake’s hitch or a Distel hitch without slipping, but also release easily when you weight and unweight it. If the rope is too slick to save on manufacturing costs, your life-support hitches can lock up or fail to grab. Always test the “hand” of the rope—how it feels and bends—before you trust it with your weight.
Sheath Slippage and Core Exposure Risks
This is the most dangerous defect in budget ropes. If the braided sheath slides along the inner core, you can have a situation where the core is cut without you seeing the damage. To test for this, tie a knot and mark the sheath; if it moves out of alignment after loading, discard the rope immediately. Reputable manufacturers ensure a tight weave; cheaper processes might cut corners here, leading to premature failure. This is a clear case where you get what you pay for regarding internal integrity.
How Do You Match a Friction Device to Your Budget Rope Diameter?
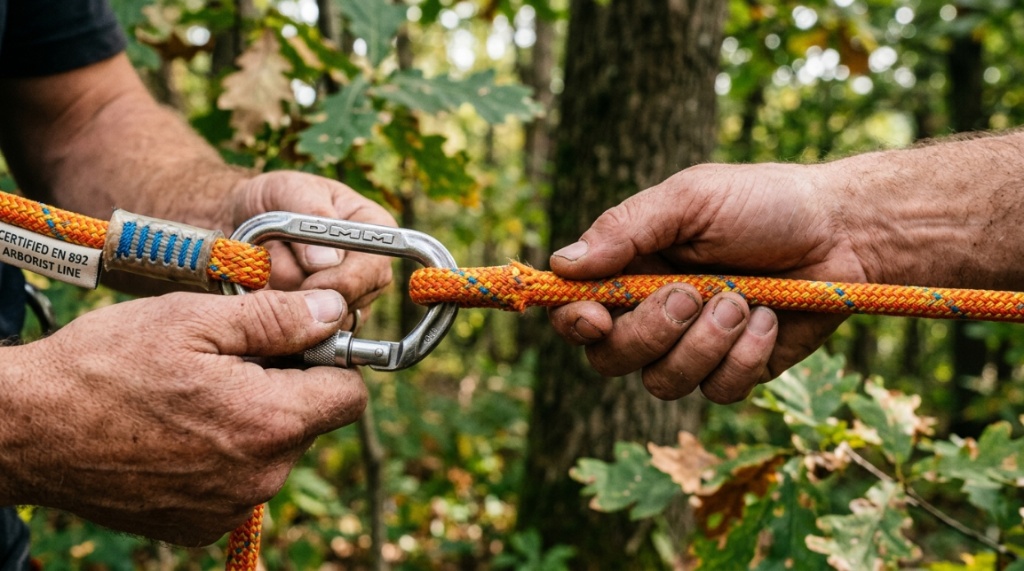
Matching the diameter of your rope to the diameter specified by your friction device is the cornerstone of safe climbing. Using a 13mm rope in a device designed for 11.5mm will cause the device to bind or, worse, fail to grip, leading to an uncontrolled descent. You must buy a kit where the hardware is explicitly rated for the included rope diameter.
Budget kits often make the mistake of packaging a standard “all-purpose” friction device with a rope that is too thick or too thin. The interaction between the rope and the device (like a Hitch Climber pulley or a Zigzag) generates the heat that controls your descent. If they don’t match, you either get a ride down that is way too fast, or you burn through your rope sheath in one descent.
Mechanical Devices vs. Traditional Hitches
If your budget is tight, a mechanical device like a Petzl Zigzag is out of reach (usually $300+). However, a “Hitch Climber” pulley setup is affordable and universally safe. This uses a pulley to reduce friction on the climb and a prusik loop to catch you on descent. For a budget kit, ensure the pulley has sealed ball bearings and the correct rope diameter stamped on the side. This is a system where mechanical advantage and friction are balanced perfectly for the rope included.
The Role of Friction Hitches in Redundancy
A friction hitch is your brake. In a budget kit, you often receive a pre-tied 8mm cord. The length of this cord matters dramatically. If it is too long, your hitch won’t engage before you hit the ground; too short, and you can’t reach it to tend it. Ensure the kit provides a hitch cord that is at least 24 inches long to allow for proper wrapping. The friction hitch is your primary defense, and it must be tailored to the rope’s coefficient of friction—which varies by brand and finish.
Device Materials: Aluminum vs. Steel
Budget kits often use aluminum carabiners and pulleys to save weight and cost. While this is fine, you must check the gate strength. In an arborist setting, a “triple-action” or “screw-lock” gate is mandatory. A cheap wire-gate carabiner can accidentally unclip when snagged on a branch. Even on a budget, demand forged aluminum with a minimum 23kN major axis rating. Steel is stronger but heavier and will fatigue your harness over a long climb, so for budget, high-grade aluminum is the standard.
Matching Retrievable Lines
If you are using a throw line to set your line, the diameter of the climbing line must work with the ring or pulley at the top. A stiff budget rope might have too much “bend radius” to pass through a standard 19mm ring shackle. This creates dangerous friction points and can weaken the rope at the anchor. Ensure your kit’s hardware has a large enough throat opening to accommodate the rope’s bend radius without pinching.
Which Rope Construction Type Offers the Best Value for Rigging and Climbing?
For a budget kit that needs to perform double duty—both climbing and light rigging—a 24-strand or 16-strand hollow braid rope offers the best balance of grip, strength, and affordability. These ropes are easier to splice than 12-strand ropes, meaning you can save money by making your own eye splices instead of buying pre-made (but expensive) sewn eyes.
The downside to a 16-strand rope is that it is less abrasion resistant than a heavier 24-strand weave. However, if you are just starting out and not dragging your rope over sharp bark constantly, the 16-strand provides a superior grip for friction hitches and is significantly cheaper. It is the “goldilocks” of the rope world for the safety-conscious climber.
Double Braid vs. Hollow Braid
Double braid ropes (like Yale’s Poison Ivy or Samson’s Velocity) have a braided core protected by a braided sheath. These are safer for high-friction applications because the core is less likely to be damaged by saw cuts. However, they are heavier and stiffer. A hollow braid (like Arbor-Plex) is lighter and cheaper but requires a tighter eye splice to be safe. For a budget kit, a double braid with a core is the safer choice because it offers redundancy; even if the sheath is cut slightly, the core might survive, giving you time to descend safely.
How Splicing Affects the Safety Rating
If you buy a kit that requires you to tie a knot to attach to the harness, you lose up to 30% of the rope’s strength. A properly spliced eye retains 100% of the rope’s rated strength. Budget kits often include sewn eyes (which are very strong) or spliced eyes. Do not buy a kit where you have to tie a figure-eight or bowline knot to connect to your bridge; this is a hidden safety hazard. Look for a “pre-sewn” or “spliced” termination.
Coating and Abrasion Resistance
Some budget ropes come with a “coating” to stiffen them for packaging, but this coating actually reduces friction and makes hitches slip. You want a rope that is “uncoated” or “dry treated” only if you plan on working in wet conditions. For dry climates, a tight, uncoated weave is safer because it grabs better. Check the label for “dry treatment”; if it’s not there, that’s fine. For the best value, prioritize a tight braid angle—this provides natural abrasion resistance without chemical additives.
How Long Does a Budget Arborist Rope Kit Last Before Replacement?
A budget arborist rope kit should last approximately 1 to 3 years for a recreational or part-time climber, and 6 months to 1 year for a full-time professional. However, the lifespan depends entirely on usage frequency, exposure to UV light, and friction damage. Safety dictates that you must retire the rope immediately if you experience a hard fall, visible core damage, or a cut in the sheath.
Many climbers make the mistake of thinking “if it’s not frayed, it’s fine.” This is wrong. Rope fibers can be crushed or glazed internally. A budget rope will show signs of wear faster than a high-end one because the sheath is often thinner. You must perform the “flex” test: if you bend the rope and see a noticeable core separation or a “mushy” feel, it is dead. The cost of a new rope is always less than the cost of a hospital bill.
Inspection Routine for Cheap Ropes
Due to lower fiber density, budget ropes require more frequent inspections. Before every climb, run the entire length of the rope through your gloved hands, feeling for soft spots or “fuzzies” that indicate abrasion. Pay special attention to the area near your split-tail; this is where the most friction and saw dust damage occurs. If the “fuzz” is thick enough to hide the color of the core, retire the line. This takes 60 seconds and is the highest-value safety check you can perform.
UV Degradation and Storage Costs
Sunlight is the enemy of all polymer ropes. Polyester resists UV better than nylon, but a budget polyester rope left in the truck bed for a summer will lose 30% of its strength. Store your kit in a rope bag that protects it from UV rays when not in use. If you keep it in a truck tool box, it will cook. Use a simple canvas or denim bag; this is a cheap investment that doubles the life of your gear, protecting your budget and your safety.
When to Retire and Upgrade
If you have to ask “Is this still safe?”, the answer is no. Trust your instincts. When a rope becomes stiff, “glassy” to the touch, or has a reduced diameter, replace it. At this point, it might be worth upgrading to a slightly higher-tier kit that features a thicker sheath or a more durable core. However, if your budget rope survived a season without a major fall, you got your money’s worth and can now invest in a smoother climbing experience. Do not use rope past its “in-service date.”
Why Is a “Work Positioning” Harness Safer Than a “Climbing” Harness for Budget Kits?
An arborist kit should always include a “work positioning” harness, not a recreational rock-climbing harness. A work positioning harness has a wider, stiffer waist belt and leg loops that are designed to support you for hours while leaning back with a chainsaw. Rock climbing harnesses are designed for dynamic falls and have thinner padding, which causes severe discomfort and can lead to poor posture and unsafe cuts when hanging in a tree.
In a budget kit, the harness is often the weakest link regarding ergonomics. A poorly designed budget harness might have bad weight distribution, shifting all the pressure to your lower hips, cutting off circulation. Look for a harness with sliding D-rings that allow you to adjust your center of gravity. A genuine arborist harness will have a “bridge” (the connection point) that is long enough for you to sit comfortably in a “chair” position, keeping your chainsaw below your center of mass.
Bridge Length and Adjustability
The bridge connects your harness to your friction hitch. In a cheap kit, the bridge is often fixed at a length that is too short, constricting your range of motion. A good budget harness will allow you to adjust the bridge length (usually via a sliding webbing adjuster). This is crucial for repositioning around the trunk. If the harness has a fixed bridge shorter than 12 inches, you will struggle to get the leverage needed for safe cutting angles.
Gear Loops and Tool Attachment
Dropping a chainsaw is a fatal mistake. Your harness must have at least two dedicated gear loops with a rigid insert to keep your tools attached. Budget harnesses often have flimsy, fabric-only loops that collapse. You don’t need five loops, but you need the ones you have to be reinforced with a plastic or metal stiffener. Use a rated carabiner to attach your saw to the ring, never just the loop itself.
Leg Loop Adjustability
Leg loops that are too loose are a death trap because you can slide out upside down. A budget harness with non-adjustable leg loops is a red flag. You need buckles (speed buckles or zip adjusters) to cinch them tight. If you wear heavy pants in winter and light pants in summer, the adjustability is mandatory to maintain that tight fit. If the leg loops have “snap shackles,” ensure they are load-rated and cannot accidentally release when snagged on a branch.
Can You Use a Rescue Line or Rappelling Rope as an Arborist Climbing Line?
The short answer is no; static and semi-static rescue ropes are not safe substitutes for true arborist rope. While they share high breaking strengths, climbing techniques differ. Arborist ropes are specifically designed to be friendly to friction hitches, providing the right “grab” for rope wrench or hitch systems. Rescue lines are often too rigid or have a slippery sheath that causes hitches to slide, leading to a fall.
Another major difference is the core-to-sheath ratio. Rescue ropes are built for minimal elongation under heavy loads, which makes them great for raising heavy loads but terrible for the shock absorption an arborist needs. When you are in a tree, the dynamics are different, and using a flat, stiff rescue line can damage your hands and alter the performance of your mechanical releases. Stick to gear that is explicitly labeled “Arborist Climbing Line.”
Identification Markings
Bona fide arborist ropes have specific markings indicating compliance with the Cordage Institute standards. These markings often include “Arborist” or “Tree Climbing” in the product name. A rescue rope will say “Fire Rescue” or “Caving.” If the kit you are viewing doesn’t specify “arborist,” it is not suitable for tree work. The stranded count and braid angle are tuned differently for arboreal applications to withstand bark abrasion and saw dust.
Water Absorption and Environment
Arborist ropes are often made with a lower water absorption rate than rescue ropes. If you treat your budget kit with a water repellent, it helps maintain strength when climbing in dew or after rain. Rescue ropes are occasionally dry-treated, but often are not, meaning they can absorb water, gain weight, and lose strength. This is a big safety factor if you want to use your kit in multiple seasons.
The “Palming” Factor
Arborist ropes are designed to be “palmed” to quickly ascend and tend the friction hitch. The texture of the rope must be gritty enough to grip but soft enough to not tear your gloves. A rescue rope, being stiffer, cramps your hands during long ascents and reduces fine motor control. This fatigue leads to mistakes. Safety means maintaining your grip strength throughout the day, which is linked directly to the rope’s hand feel.
When Is the Right Time to Buy a Higher-End Kit Instead of a Budget Kit?
The right time to upgrade is when: 1) You start climbing more than twice a week, 2) You are doing production removal work where speed is critical, or 3) You are weight-conscious and need lighter gear to reduce fatigue. Budget kits are heavier, and the added bulk can slow you down significantly, increasing the risk of falls due to fatigue.
However, you should never “upgrade” just because a higher price tag looks cooler. A budget kit is perfectly safe for learning, performing basic pruning, and light removals. The moment you feel your budget gear is holding you back from making a safe maneuver—like reaching for a limb that is just out of reach due to a shorter bridge or stiffer rope—it is time to invest. Upgrading to a thinner, lighter rope (like a 9mm) reduces weight but costs more, and this is a premium feature worth saving for.
Signs of Overheating Equipment
If your budget friction device is getting scalding hot to the touch on descent, you are generating too much friction too quickly. While this is a technique issue, it can also be a gear failure. Cheaper pulleys have less efficient bearings, causing heat to build up. If this happens, you need a more efficient mechanical device. That downtime and thermal risk justifies the upgrade for safety.
Comfort Levels Are a Safety Metric
If you are so uncomfortable in your budget harness that you are rushing your cuts to get down, you are a hazard. Pain and discomfort lead to distraction. When the harness padding compresses too much or the waist belt digs in, you lose core stability, which is vital for body positioning with a chainsaw. Prioritize your comfort; if the gear doesn’t fit right, no amount of bargain pricing is worth it.
Long-Term Cost Analysis
A budget kit that needs replacing in 6 months costs more in the long run than a premium kit that lasts 2 years. However, if you are climbing occasionally, the budget kit’s shelf life extends to 2 years. Do the math on your usage. If you are a professional, every hour of downtime is lost income. A high-end kit with smoother components reduces fatigue and increases productivity, paying for itself in a week. If you are a weekend warrior, save the money and stick with the budget gear.
Can You Trust Amazon Reviews for Budget Arborist Rope Kits?
You can trust those reviews, but only with a heavy dose of skepticism and critical thinking. Many reviews are from beginners who don’t know what safe gear looks like, or worse, they are incentivized reviews that don’t actually use the gear in the field. For safety, you must cross-reference the reviews with data from arborist-focused forums and professional standards.
When you look at reviews, search for terms like “elongation,” “hitch slipped,” or “sheath slid.” If you see negative comments about the rope being too slippery or the prusik melting, ignore the 5-star overall rating and look at the 1 and 2-star reviews. These are where the real safety issues are revealed. A budget kit might have a 4.5-star average, but if the single-star reviews mention core shots occurring too easily, that’s a pattern of failure.
Spotting Fake Reviews
Look at the photo reviews. A safe arborist setup includes a helmet, a lanyard, and correct harness fit. If the photos show the model climbing without a helmet or with the friction hitch tied incorrectly, take their praise with a grain of salt. The visual evidence of the gear’s condition after six months of use is far more valuable than the text description. Look for close-ups of the rope ends—if they are fraying excessively in the photos, the manufacturing quality is low.
Ignoring the “Weight” Rating
Amazon reviewers often mistake the “Max load” rating for a “safety factor.” The listing might say “Supports 300 lbs,” but that is the working load limit, not the breaking strength. A safe arborist rope needs a breaking strength around 6,000 lbs even for a 150 lb climber because of the forces generated in a fall. Do not rely on the product listing’s “Capacity” field for safety; rely on the MBS (Minimum Breaking Strength) which is usually found in the technical PDF or the manual.
Cross-Referencing with Manufacturer Data
Before purchasing, go to the manufacturer’s website and download the specific product sheet for the rope that comes in the kit. If the kit doesn’t mention the exact generic rope model (e.g., using “Polyester 11mm” rather than a brand name), treat it with caution. If a kit is not clear about the rope model or construction, it is likely a generic import lacking proper traceability. Reputable certification requires a paper trail from the fiber to the finished knot.
How to Perform a Field Test on Your New Budget Kit Before Climbing
Before you ever step off the ground, you must perform a static load test on your new budget kit. Do not trust the packaging. Set up a short anchor (about 2 feet high) and hang your full body weight on the rope and harness. Jump, bounce, and lean back to simulate the stresses of climbing. If you hear any “popping” sounds or feel the harness moving in a way that suggests creaking, stop and inspect.
This process takes about 15 minutes and will tell you if the friction hitch works correctly. The hitch should grab the rope tightly but be easy to “tend” (slide up) when you are unweighted. If the hitch bites too hard and locks up, the rope is too soft. If it slides down slowly under your weight, the rope is too slick for the hitch cord provided. Adjust the number of wraps on the hitch until it feels right, or replace the prusik cord with a different fiber type.
Testing the Friction Hitch Grip
Put your weight on the system and then release it. The hitch should lock off instantly. Then, place your hand on top of the hitch and push down to “tend” the slack; it should slide smoothly. If it jerks, you risk tendon damage in your hands. This test is non-negotiable. If the kit fails this test, it is not safe, regardless of the price or the marketing claims.
Checking the Carabiner Gates
Clip and unclip all carabiners at least 10 times. Ensure the screw locks engage smoothly without cross-threading. Check the “nose” of the carabiner; if it has sharp edges, it will cut your harness loop. A soft aluminum carabiner can wear down and create burrs. If you notice any grinding feel, return the kit immediately. This is a sign of low-quality manufacturing that could fail under a dynamic load.
The “Jerk” Test on the Bridge
Finally, stand in the harness and have a friend jerk down hard on the bridge. The stitching on the bridge must hold tight. Look at the threads for any signs of stress or broken fibers. This simulates the initial shock of a small fall. If the bridge stitches stretch or open, the harness is not rated for arborist work. This simple test can save you from a catastrophic harness failure while suspended high above the ground.
Frequently Asked Questions
Can I use arborist rope for a swing or playing in the yard?
No. Arborist ropes are designed for controlled, load-bearing work with specific friction devices. Using them for swings exposes them to UV degradation, UV, and bending fatigue at the branch, which can sever internal fibers. This creates unseen damage that can fail violently during a future climb. Use a dedicated swing rope and protect your climbing line.
Is a 12-strand rope unsafe for beginners?
Not inherently, but 12-strand ropes are harder to splice and have a lower abrasion resistance than 16-strand ropes. For a budget kit, a 16-strand rope is safer because it grips friction hitches more predictably, reducing the risk of a “slip-pin” fall. Beginners benefit from a rope that grabs consistently.
How much does a safe budget arborist kit weigh?
A complete budget kit (rope, harness, carabiners, and wrench) typically weighs between 12 and 15 pounds. If it weighs significantly less, components are likely made of cheaper, weaker material or the rope is too thin for safe work positioning. Heavier gear is safer for beginners because it usually implies thicker, more durable construction.
What is the minimum rope diameter for safety in a budget kit?
You should never use a rope smaller than 11mm for traditional friction hitches. A 11.5mm or 11.7mm rope is ideal for budget kits. Anything smaller requires a mechanical device (like a Zigzag) to be safe and is too expensive for a budget kit. Stick to 11-12mm for maximum grip and durability.
Can I replace the harness but keep the rope?
Yes, the rope is typically the longest-lasting component. You can safely replace the harness if you find a better fit, but the rope and the friction hitch must remain compatible. If you change the rope’s diameter, you must change the hitch cord size. Keeping the rope is fine, but always re-verify the knot compatibility with the new harness bridge.
Why is my new budget rope leaving dust on my gloves?
That is a sign of a heavily “coated” rope. The coating is used to protect the rope during shipping but is not ideal for climbing. This dust will eventually wear off, but until it does, your friction hitch will be slippery. Wipe the rope down with a dry cloth before your first serious climb to speed up the break-in process safely.