
Key Takeaways
- Photo cleanup is most effective when it removes distractions without changing the story of the image.
- Small, deliberate edits usually look more convincing than large, aggressive changes.
- Texture, light direction, shadows, reflections, grain, and perspective determine whether a repair looks real.
- AI can speed up routine cleanup, but every result needs a human review.
- Always preserve the original file before making changes.
A great photo cleanup should be nearly invisible. The goal is not to create a flawless but artificial scene. It helps the viewer focus on the intended subject by removing visual noise that was never important to the image in the first place. A modern object remover can quickly erase a stray person, cable, bin, or unwanted prop, but the best outcome still depends on thoughtful choices. Natural-looking editing starts with restraint. Removing a trash can beside a travel landmark or a loose cord behind a product can improve the composition without changing its meaning. Removing permanent damage from a property listing, changing a person’s appearance beyond recognition, or deleting an important sign from a documentary image is different. Cleanup should clarify the picture, not rewrite reality.
Why Natural-Looking Editing Matters
Every photo has a visual hierarchy. The subject, whether it is a person, place, product, or room, should receive attention first. Clutter at the edge of a frame, bright objects in the background, and accidental reflections can pull the eye away from that subject. A clean image feels more intentional, but it should still retain believable details such as natural skin texture, real shadows, and consistent surroundings. The most successful edits respect what the camera captured. If a change makes viewers stop and wonder why a wall suddenly looks blurry, why floorboards no longer align, or why a removed chair still casts a shadow, the cleanup has become the distraction.
What Counts as a Distraction?
Routine cleanup usually focuses on elements that are temporary, accidental, or visually irrelevant. Common examples include:
- Unwanted people, cars, or bags in the background.
- Wires, poles, bins, signs, and small objects near the edge of the frame.
- Temporary clutter on tables, counters, floors, and workspaces.
- Glare, reflections, stains, sensor dust, and small blemishes.
- Outdated labels, props, or branding that no longer fit a current campaign.
Choose the Smallest Useful Edit
Before removing anything, look at the full photograph. A crop, slight rotation, or modest exposure adjustment may solve the problem without rebuilding any pixels. When removal is necessary, select only the object and the obvious visual evidence associated with it, such as a clear reflection or a cast shadow.
- Review the image at full size and decide what truly competes with the subject.
- Try cropping first if it preserves the composition.
- Select the smallest area that fully covers the unwanted element.
- Inspect nearby details after the removal, especially edges and patterns.
- Compare the result with the original before saving a final version.
How Background Reconstruction Works
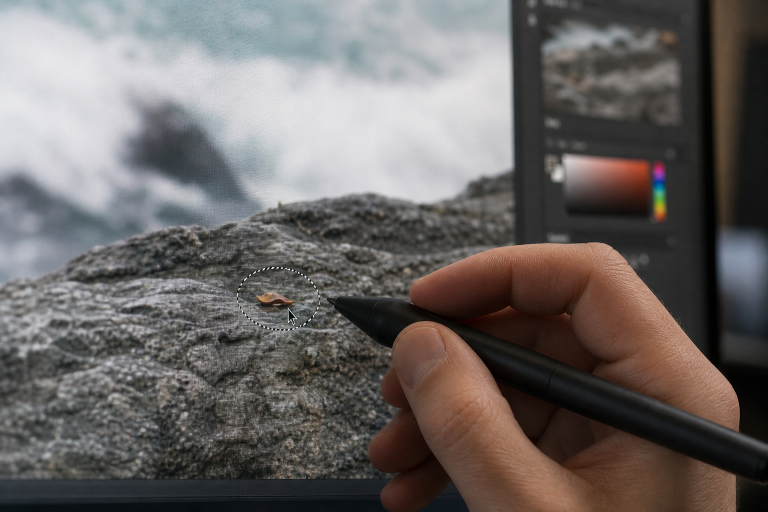
When an item is removed, the editing tool needs to rebuild the space behind it. This process is often called image inpainting. It uses nearby pixels as clues about what belongs in the missing area: the texture of grass, the color of a wall, the direction of a road, or the spacing of tiles. Broader computational photography techniques also show how software can support and extend digital image-making. Light and geometry matter as much as texture. A floor that recedes toward a doorway must continue at the same angle. A wall must keep the same brightness and grain. Repeating structures such as brickwork, railings, window grids, fence posts, and patterned fabric remain difficult to process because even a small alignment error is easily spotted.
A Simple Photo Cleanup Workflow
Step 1: Save the Original
Work from a duplicate file, not the only copy. Use a clear filename so the untouched original, working version, and export are easy to identify later.
Step 2: Check the Composition
Confirm that a crop, straightening adjustment, or exposure correction cannot solve the problem more simply. These edits preserve more of the original scene.
Step 3: Identify the Full Distraction
Look beyond the object itself. Include attached fragments, obvious outlines, reflections, and shadows when they clearly belong to the item being removed.
Step 4: Apply the Removal
Use the appropriate cleanup tool, then inspect the result both on-screen and at 100 percent zoom. A repair that looks fine on a phone may reveal soft edges or repeated textures on a larger display.
Step 5: Repair Small Artifacts
Check for halos, broken lines, strange blur, duplicated details, or patches with different grain. If the first result is not convincing, undo it and try a smaller selection or a manual correction.
Step 6: Export Carefully
Keep a high-quality master version. Then create smaller copies for web listings, social media, email, or other platforms where file size matters.
When AI Editing Helps Most
AI-assisted cleanup is especially useful for simple backgrounds and high-volume tasks. It can be effective for small objects against skies, grass, pavement, plain walls, and other broad textures. It is also useful when product teams need consistent images or real estate photographers need to remove minor temporary clutter. Speed is valuable, but AI can invent details, alter nearby objects, or produce a result that looks plausible only at a glance. Treat every generated repair as a draft. Review the background, the subject’s outline, and any meaningful text before publishing.
When Manual Editing Is the Better Choice
Manual tools are often safer for faces, hands, text, fine jewelry, transparent objects, reflective surfaces, architecture, and scenes with strong directional shadows. They also provide more control when a subject overlaps with a complex background. For research, journalism, technical documentation, evidence, and other records where accuracy is essential, changes may need to be limited or disclosed. The U.S. Office of Research Integrity outlines best practices in image processing that emphasize preserving originals and documenting significant edits.
Common Problems After Object Removal
Repeated Texture
Copied-looking bricks, tiles, leaves, or sections of fence can reveal the repair. Zoom in and check whether patterns repeat too neatly.
Broken Perspective
Inspect floors, roads, shelves, rooflines, and building edges. Lines should continue smoothly through the edited area.
Missing Shadows or Lighting Mismatch
A removed object may leave behind a shadow, reflection, or darker patch. The rebuilt area should match the surrounding brightness, color temperature, sharpness, and grain.
Practical Guidelines for Different Photo Types
- Travel photography: Remove small distractions, but keep landmarks, relevant signs, and the character of the place accurate.
- Product photography: Clear dust and stray props while preserving the product’s actual color, shape, texture, and finish.
- Real estate photography: Reduce temporary clutter, but do not hide permanent damage or material features of the property.
- Portrait photography: Remove temporary marks and background distractions while retaining natural skin texture, facial structure, and believable light.
A Final Quality Checklist
- Does the subject still look natural?
- Do lines, textures, and repeating patterns continue correctly?
- Are shadows and reflections consistent with the scene?
- Does the edited area match the photo’s sharpness and grain?
- Does the image still communicate the same story?
- Is the untouched original stored safely?
Conclusion
Good photo cleanup is quiet and purposeful. Viewers should notice the subject, composition, and overall story rather than the editing work behind the image. The best results come from making the smallest useful changes, carefully checking surrounding textures, lighting, shadows, and edges, and avoiding edits that make the scene look artificial. Keeping the original file intact also provides a reliable backup if further adjustments are needed. Whether you are removing distractions, correcting small imperfections, or preparing an image for online use, careful editing can improve clarity without changing the character of the photograph. By combining subtle adjustments with thoughtful review, photographers and content creators can produce cleaner, more professional images that still feel honest, natural, polished, and true to the original scene.